Translate

Saturday, December 30, 2017

Build It and They Will Come; Finished Just in Time

The next 18 'chapters' document stone landscaping improvements from the beginning of September through the end of November 2017.

When you reach the bottom of each 'page' of posts, look for the button on the lower right that says OLDER POSTS.  Clicking that will bring up the next series.

Although blogs generally go back in time, the next 18 are organized so that you start at the beginning and get an idea of the different sub-projects:

Creating a terrace around fish pond next to carport
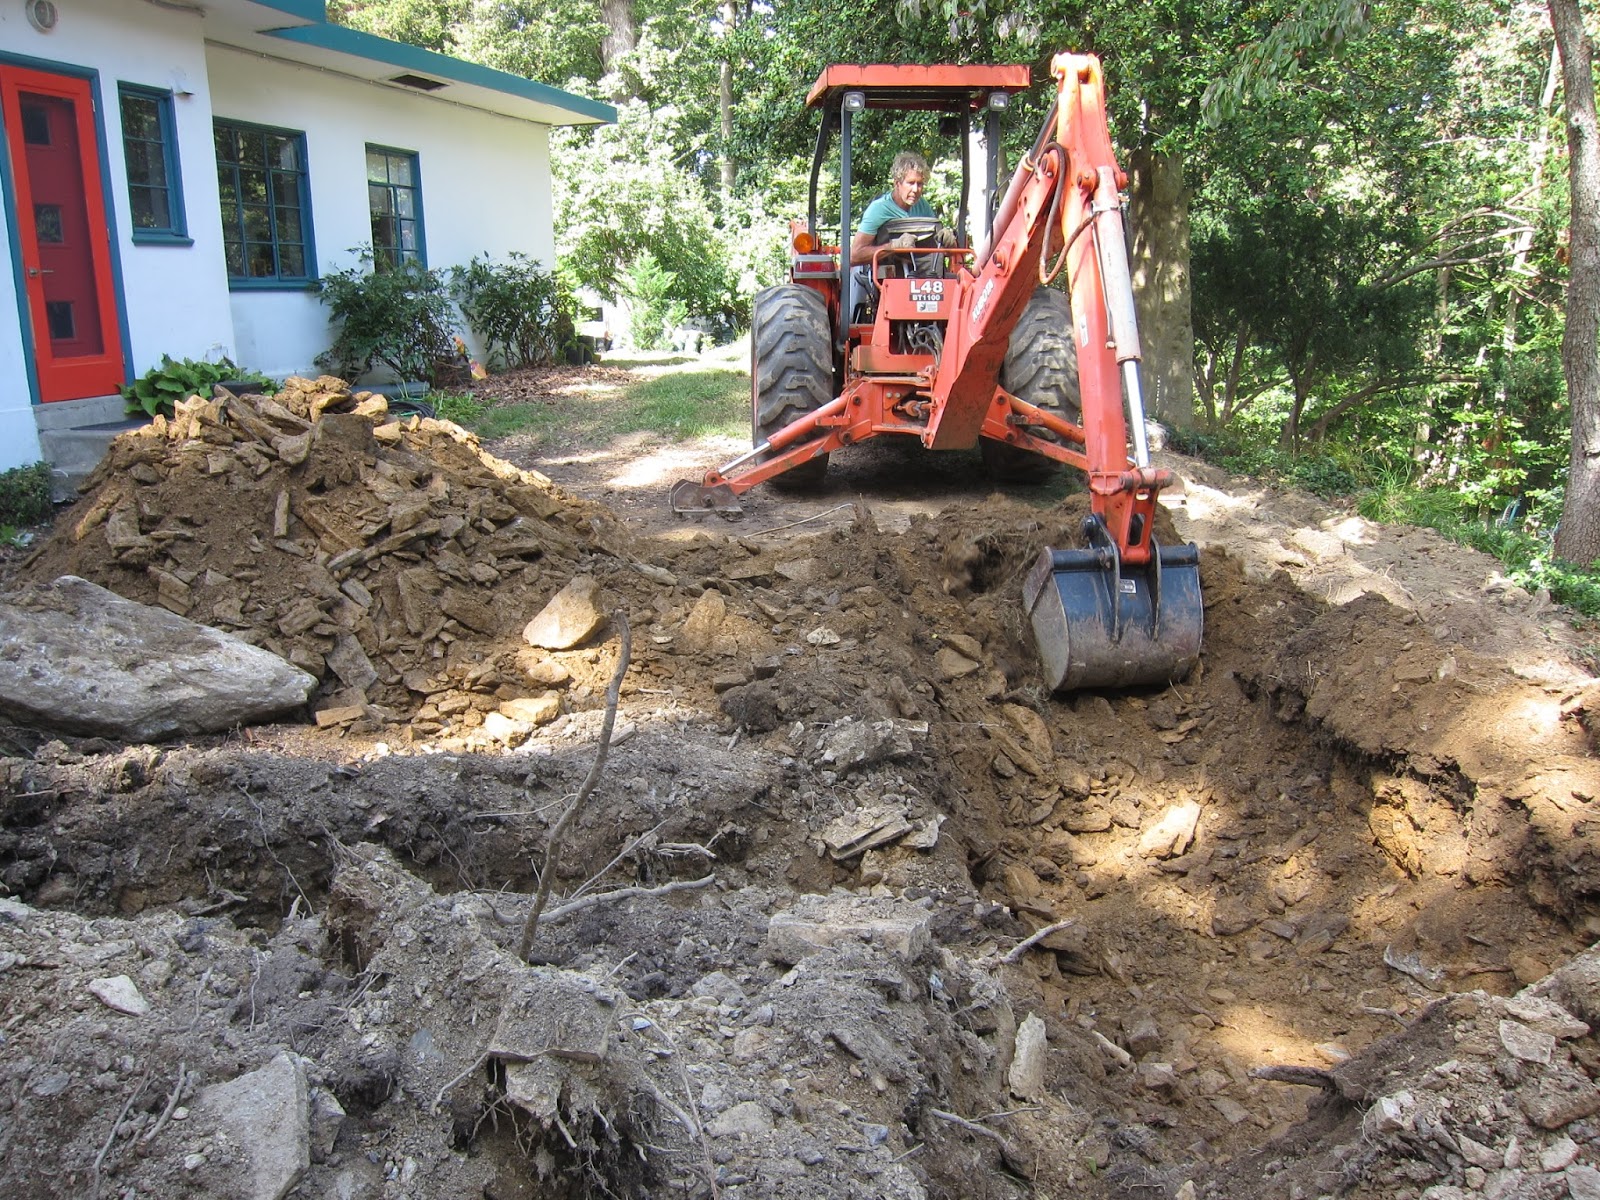
dig  trench
build a concrete block wall and stucco it
put in plants and boulders and beds
levelling, non woven geotextile fabric and gravel on top of non-bed areas

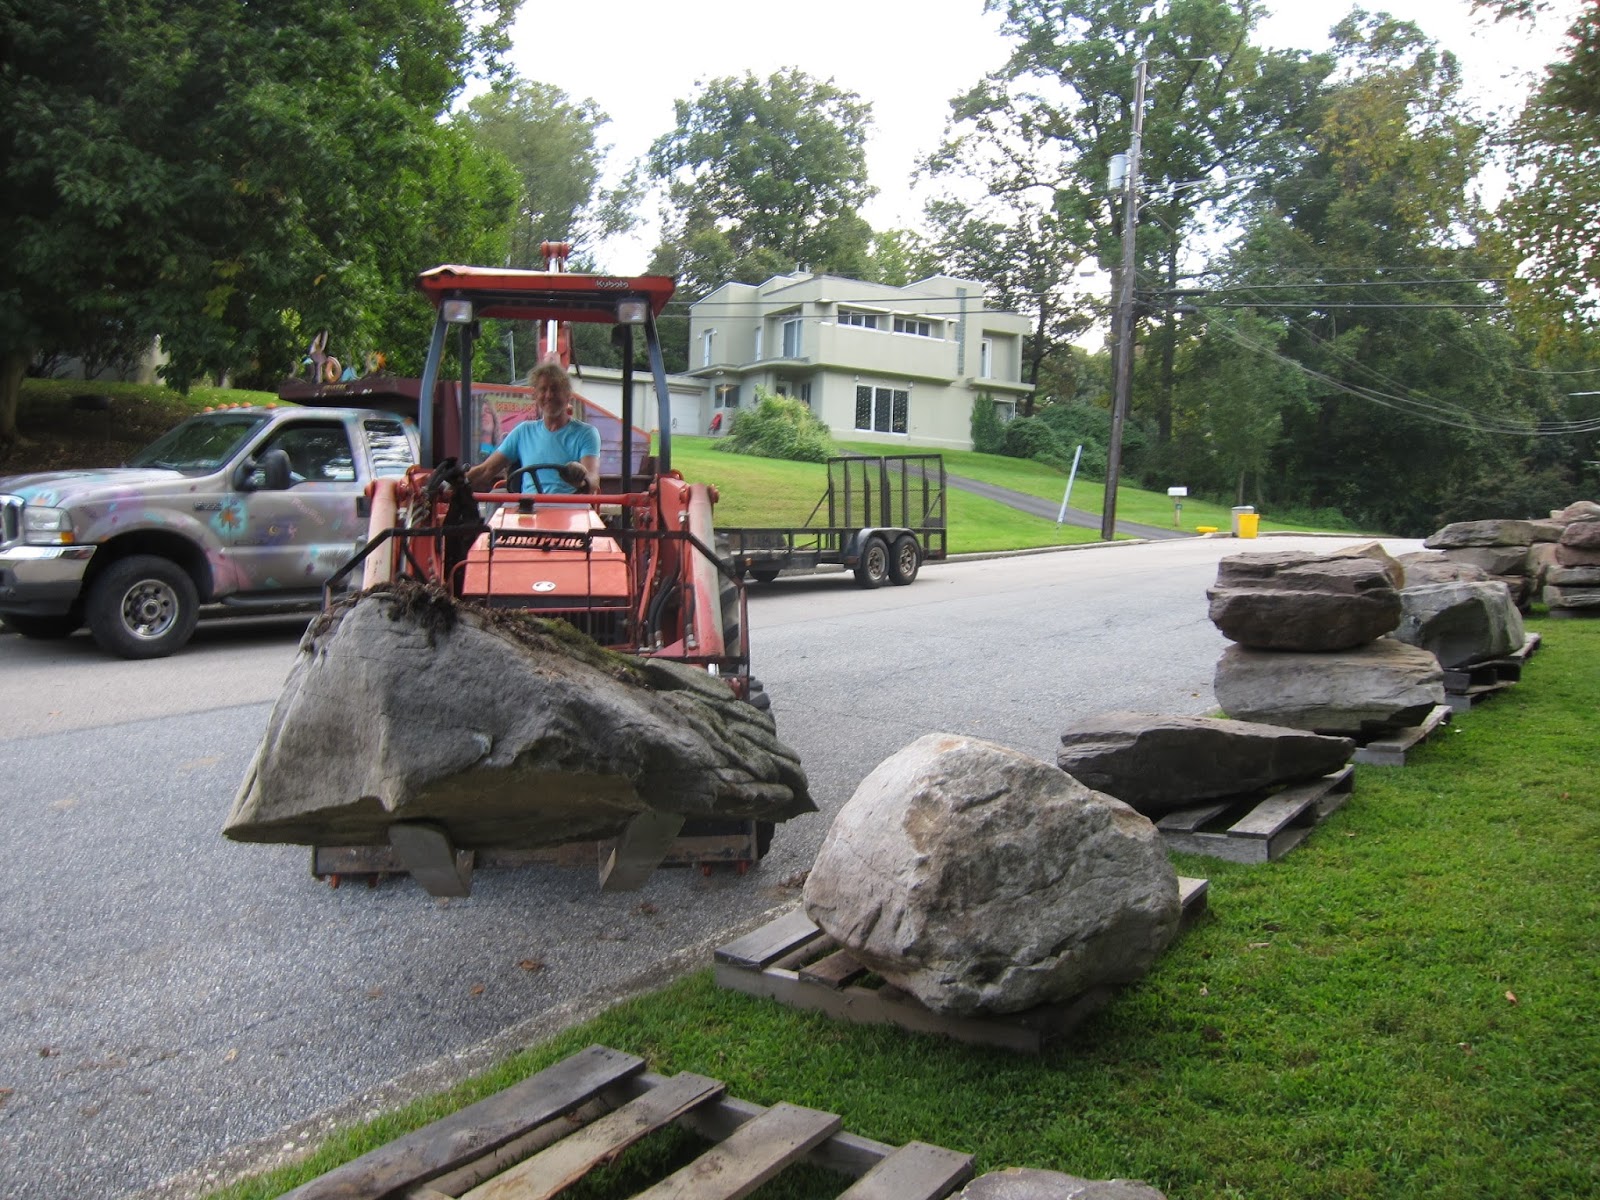
Stone Arrangement at street corner, see photo  below

Building steps from street corner up to terrace and around carport

Building a Zen Garden in back of the house
Clearing decks
Digging and constructing an infiltration trench
Stabilize the slope edge
Place smaller limestone  slabs
Testing and visualizing
Place large Wissahickon path slabs
Place large vertical limestone slabs
Delineate planting beds:  plant shrubs and line with cobbles; mulch
Lay non woven geotextile fabric and gravel


Landscape stones were  appreciated by local children.


The stone landscape project finished just in time.  Two days later snow and winter came.


The stones were just a few days earlier the children had been playing.


Tuesday, December 19, 2017

Transform Your Landscape; Transform Your Life


Peter Jon Snyder, Artganic Design, Bernville PA

" I am very good with people and design.  I know how to make them feel good.
When I create things, afterwards people feel different about
themselves,
their property,
their friends, 
entertaining,
their lives.
I look at a work project as an exchange of energy.
I bring creativity, craftsmanship, knowledge and hard work.
The client brings their input, dreams, support and appreciation."

Turns out to be true.  Look at these before and after shots:


https://www.facebook.com/peterjon.snyder
https://www.flickr.com/photos/56507289@N04/
peter jon snyder images

Stone Project, First Day


First Day at the beginning of September, stones delivered from Rolling Rock.


Peter gets right to work doing what he loves to do, moving boulders, above.
Below, he plots changes, construction, how  to transform the landscape.


Pond Terrace: Clear, Dig Trench for Formers, Build Wall


The area around the carport was sloping and did not have much interest.


Right away, the Norway Spruce was removed and trench dug.


 Formers for concrete foundation.


Concrete block wall.
About a month of work so far.

Pond Terrace: Steppers, Plants, Leveling, Gravel


Stepping stones connect terrace around pond to path.
Grasses are planted around limestone boulders.


Leveling the surface with screening grit.


Geotextile fabric laid above screenings and gravel on top of terrace.

Pond Terrace, Completion


Terrace garden from above.

Looking down slope along steppers.
Corner boulders are below beech at street corner.

Boulders at Street Corner


Before work started, around September 1.


After one week, below, only a couple of stones had been added.


3d week Sept:  large limestone slab was carefully placed in position and later raised upright.
It resembles a bird or gryphon.


Vertical Wissahickon slab (brown) was placed in mid-October.


At the beginning of December, soil was added around boulders and, finally, mulch.

Steps from Street Corner Up Around the Beech


Before work began, about September 1


Steppers went in fast, within the first few days.


After one week, below


Note that boulders went in at the same time as companions to the stepping stones.


After ten days, approaching the carport and more level ground.

Top of the Stairs: Stepping Stones Around the Carport

Once stepping stones reached the top of the slope, the grade flattened.
Large stones could be put down for the junction of two paths around the carport.


Plants softened stones to look as if they had always been there.  At the head of the steps (below), the path bends around the carport toward the back - Zen Garden.


Zen Garden: Clearing the Decks and Digging the Trench

Back of the house had been a tri-level deck above an eroding slope, with a pit from an abandoned pond.  After discussion and soul searching, we decided to put in an underground infiltration trench for stormwater and an above-ground Zen Garden.
In this, we were inspired by Japanese Buddhist monk and master garden designer Shunmyo Masuno.  Our 'bible' was the book Zen Gardens, the Complete Works of Shunmyo Mason, Japan's Leading Garden Designer.   

So, first was demolition and leveling the slope.
Second, digging for the infiltration trench.
It was very tight for the tractors and there was a lot of 'clean fill' to truck away.


Above, taking out weedy vegetation along the edge and leveling the slope edge.
Below, starting the long, tedious, tight  process of digging the infiltration trench.


Zen Garden: Infiltration Trench


Four of these five shots were taken from roughly the same vantage point.
All of this action happened between October 1 and 3, 2017.
The underground trench is about 50 feet long, 4 feet wide and 3 feet deep.
It is wrapped in heavy duty non woven geotextile fabric and filled with clean gravel.
Downspouts connect to an 8 inch perforated pipe that runs through the middle of the trench and allows roof runoff to seep back into the ground without erosion.
The infiltration trench was built to specs of Pennsylvania Dept of Environmental Protection:
Pennsylvania Stormwater Best Management Practices Manual Chapter 6.4.4